
I’ve been using my RSPdx SDR for a year now. My favorite cross platform SDR program was SDRangel. It’s still probably has the most decoding features. In August SDRplay released their new cross platform program SDRconnect. It’s only in beta/preview now but I anticipate it will be a real contender when it’s done. Right now it works great as a somewhat simple SDR but it’s also a powerful SDR server.
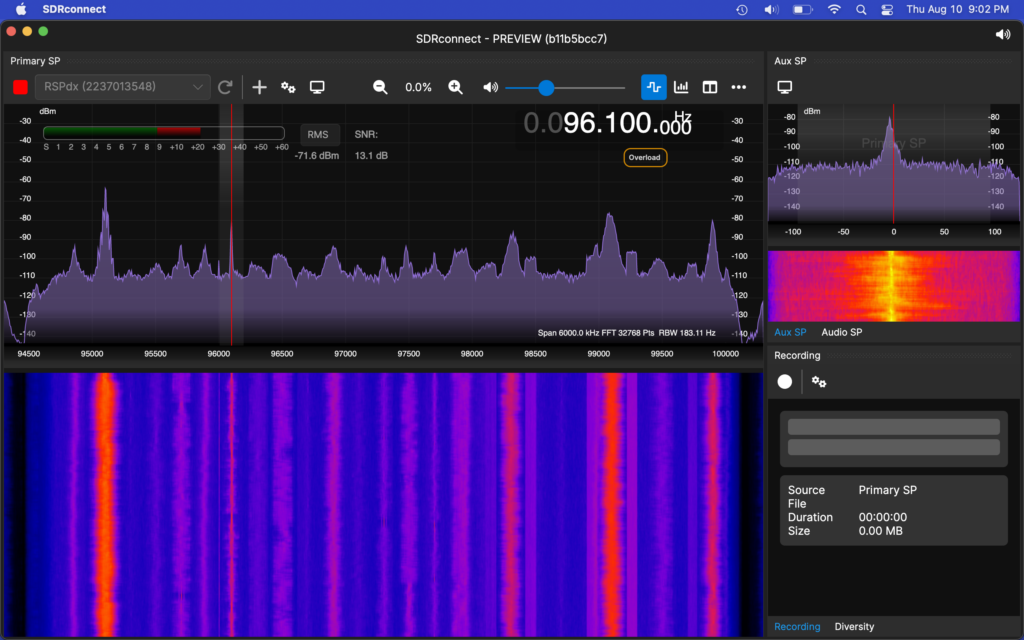
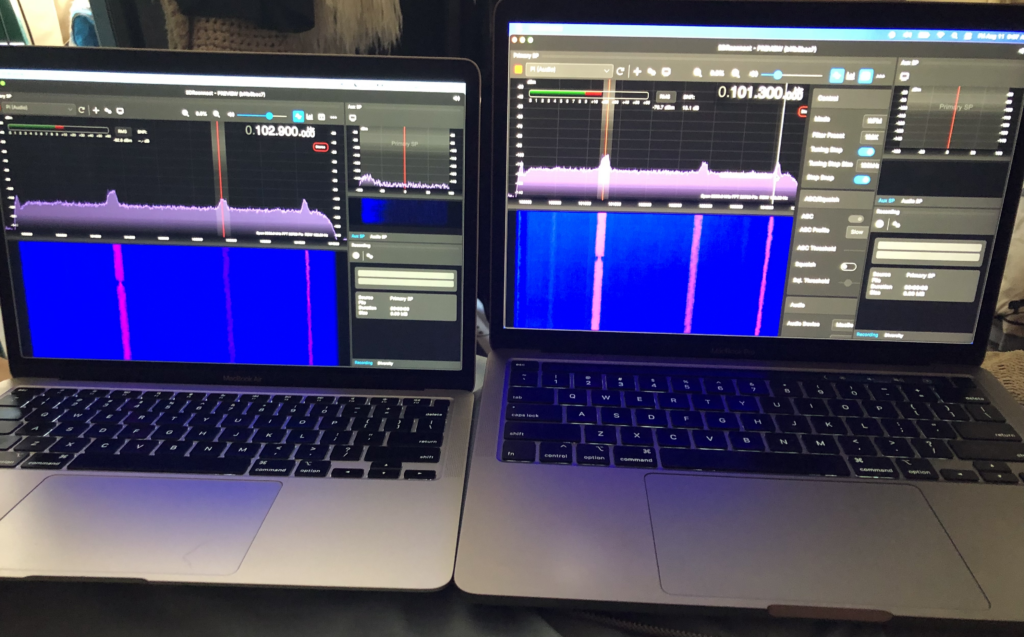
Below are two laptops streaming different FM radio stations with SDRConnect being served off a Raspberry Pi with the SDRdx. This is a great solution for remote mounting of the SDR.
While that’s cool, I recently stumbled upon some Youtube videos from Paul N2EME and others in the Front Range 6 Meter Group. These guys are real pros and their videos are worth watching. What caught my eye was their suggestion of using a SDR rather than the rx side of a transceiver. There are a lot of benefits, the obvious is the big band scope. With a quality SDR you can see an entire band at once. But the thing that convinced me to give it a try was the ability to basically monitor digital, analog and everything else all at the same time. For instance you can decode FT4, FT8, MSK144, Q65 and any other modes simultaneously while also listening to the USB calling freq in your right ear and the FM calling freq in your left ear. Imagine what that could do for you in a contest!
The way this works is by using a program called SDR Console. Unfortunately SDRC is a Windows only application but it is pretty amazing. What it does better than anything else is to be able to create ‘receivers’ within the viewable bandwidth. In conjunction with Virtual Audio Cable and OmniRig each of these receivers perform like a separate radio. It’s possible to have about 20 different receivers at once.
As a proof of concept I created three receivers and tuned to the 40M band. The first receiver was set up to monitor FT4, the second FT8 and the third just to listen. The results are below.


All I can say is Wow! It took some figuring out but the end result speaks for itself. Basically the first receiver was configured for USB on 7.0475 MHz and the audio sent to VAC channel 1. WSJT was then configured to use the same VAC channel. The second receiver was configured the same way but on 7.074 MHz and the audio on VAC channel 2. A second instance of WSJT was run listening to channel 2. The third receiver was tuned to a CW station with the output going to the computers speakers. You can actually see the morse code on the waterfall. I also had OmniRig running on each of these receivers. So whichever receiver was active it would also tune the transceiver to the same frequency. I can’t transmit yet as I’ll have to add a RF relay (and probably sequencer) to switch between the SDR and radio. But it worked flawlessly! A block diagram of how the station will eventually look is below.
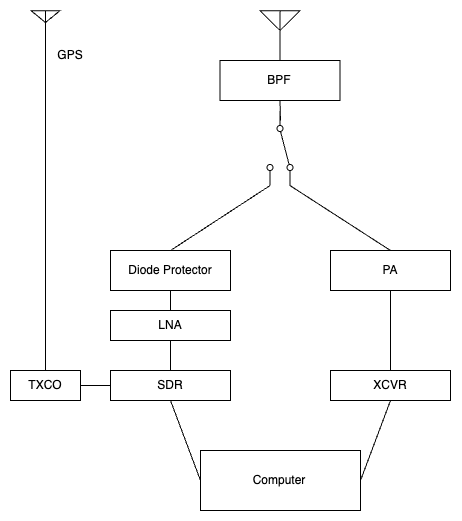
My biggest concern with the design is how much RF is going to bleed over at the relay. On 50, 144 and 222 the PA will be putting out 1000W. I may end up cascading an additional relay between the main relay and the diode protector that terminates into a 50 ohm load just to be safe as the receive chain is always on. Adding a sequencer to insert a little delay to let the relay settle is always a good idea. The sequencer can also cut the power to the LNA which will also help prevent it from being damaged.
Initially I was running this all on a few year old Surface laptop as it’s the only Windows machine I currently own. It ran OK but had the occasional skips, especially when running multiple receivers and copies of WSJT at the same time. Since it was Black Friday I checked the local deals and then Amazon. I wanted something small but powerful and cheap enough for the project. There were a number of small form factor computers out there and many only a little over $200. But close inspection showed that they were either not Win 11 compatible or the processors were EOL and would not be supported in future versions. What caught my eye was the GMKtec Nucbox G2. First off it is tiny and can mount to the back of the display. But more importantly it had really good specs. An Intel 12th gen Alder Lake N100 4 core/4 threads processor (2023), 1 TB SSD drive and 12 GB DDR5 4800 RAM. It has two HDMI and one DP video ports which was important as this set up needs a lot of screen real estate and it came with Win 11 Pro. This mini computer is no gaming machine but it more that suits the needs of this project and the best part was very wallet friendly at under $190 delivered next day.
So far the project has exceeded my expectations. Still lots to learn with SDRC. For instance how to set up 3 different receiver sets, one for each band but using different antenna ports on the RSPdx. Also need to learn how to optimize the gain and filtering. I’ll post updates as this project progresses.