With so many of my friends getting into solar I wanted to create a series of posts to help them with their installs. One of the places you can save a ton of money is by building your own batteries. Right now LiFePO4 battery cost is the lowest it’s ever been but there is still a huge saving by building your own vs. prebuilt.
As of the time of writing this, the EG4 LifePower4 server rack battery is $1199. That’s for a 48V 100Ah battery. I just purchased 16 320Ah cells for $900. Add another $100 for the same JK BMS (Battery Management System) that’s in the EG4 battery and you have a battery that has more than 3X capacity of the LifePower4. Add some breakers, wiring and other miscellaneous parts and you come out at the same price. The only difference is you don’t have the nice case. If you want a case you can add one from a number of DIY vendors for about $400-500. Even then you are still less than 1/2 the cost of buying 3 LifePower4’s and in a smaller package.
Let’s get into what’s involved in building your own battery. The first thing is to order cells. The best deals are going to be found of AliExpress or Alibaba. If you are really trying to save as much as possible your best bet is to purchase the cells directly from China and have them shipped. The downside to this method is that it will take a number of weeks for them to get here. The second best method is to order from the same vendor but from US stock. Of course it’s going to be a little more expensive as they have factored in the freight costs to get the cells here. If you are hesitant from purchasing directly from a Chinese company I recommend looking at Docan Power (https://docanpower.com). They have a facility in Texas and also sell direct from China or locally shipped. They are a little more expensive but you have the ability to have real customer service if you need it.
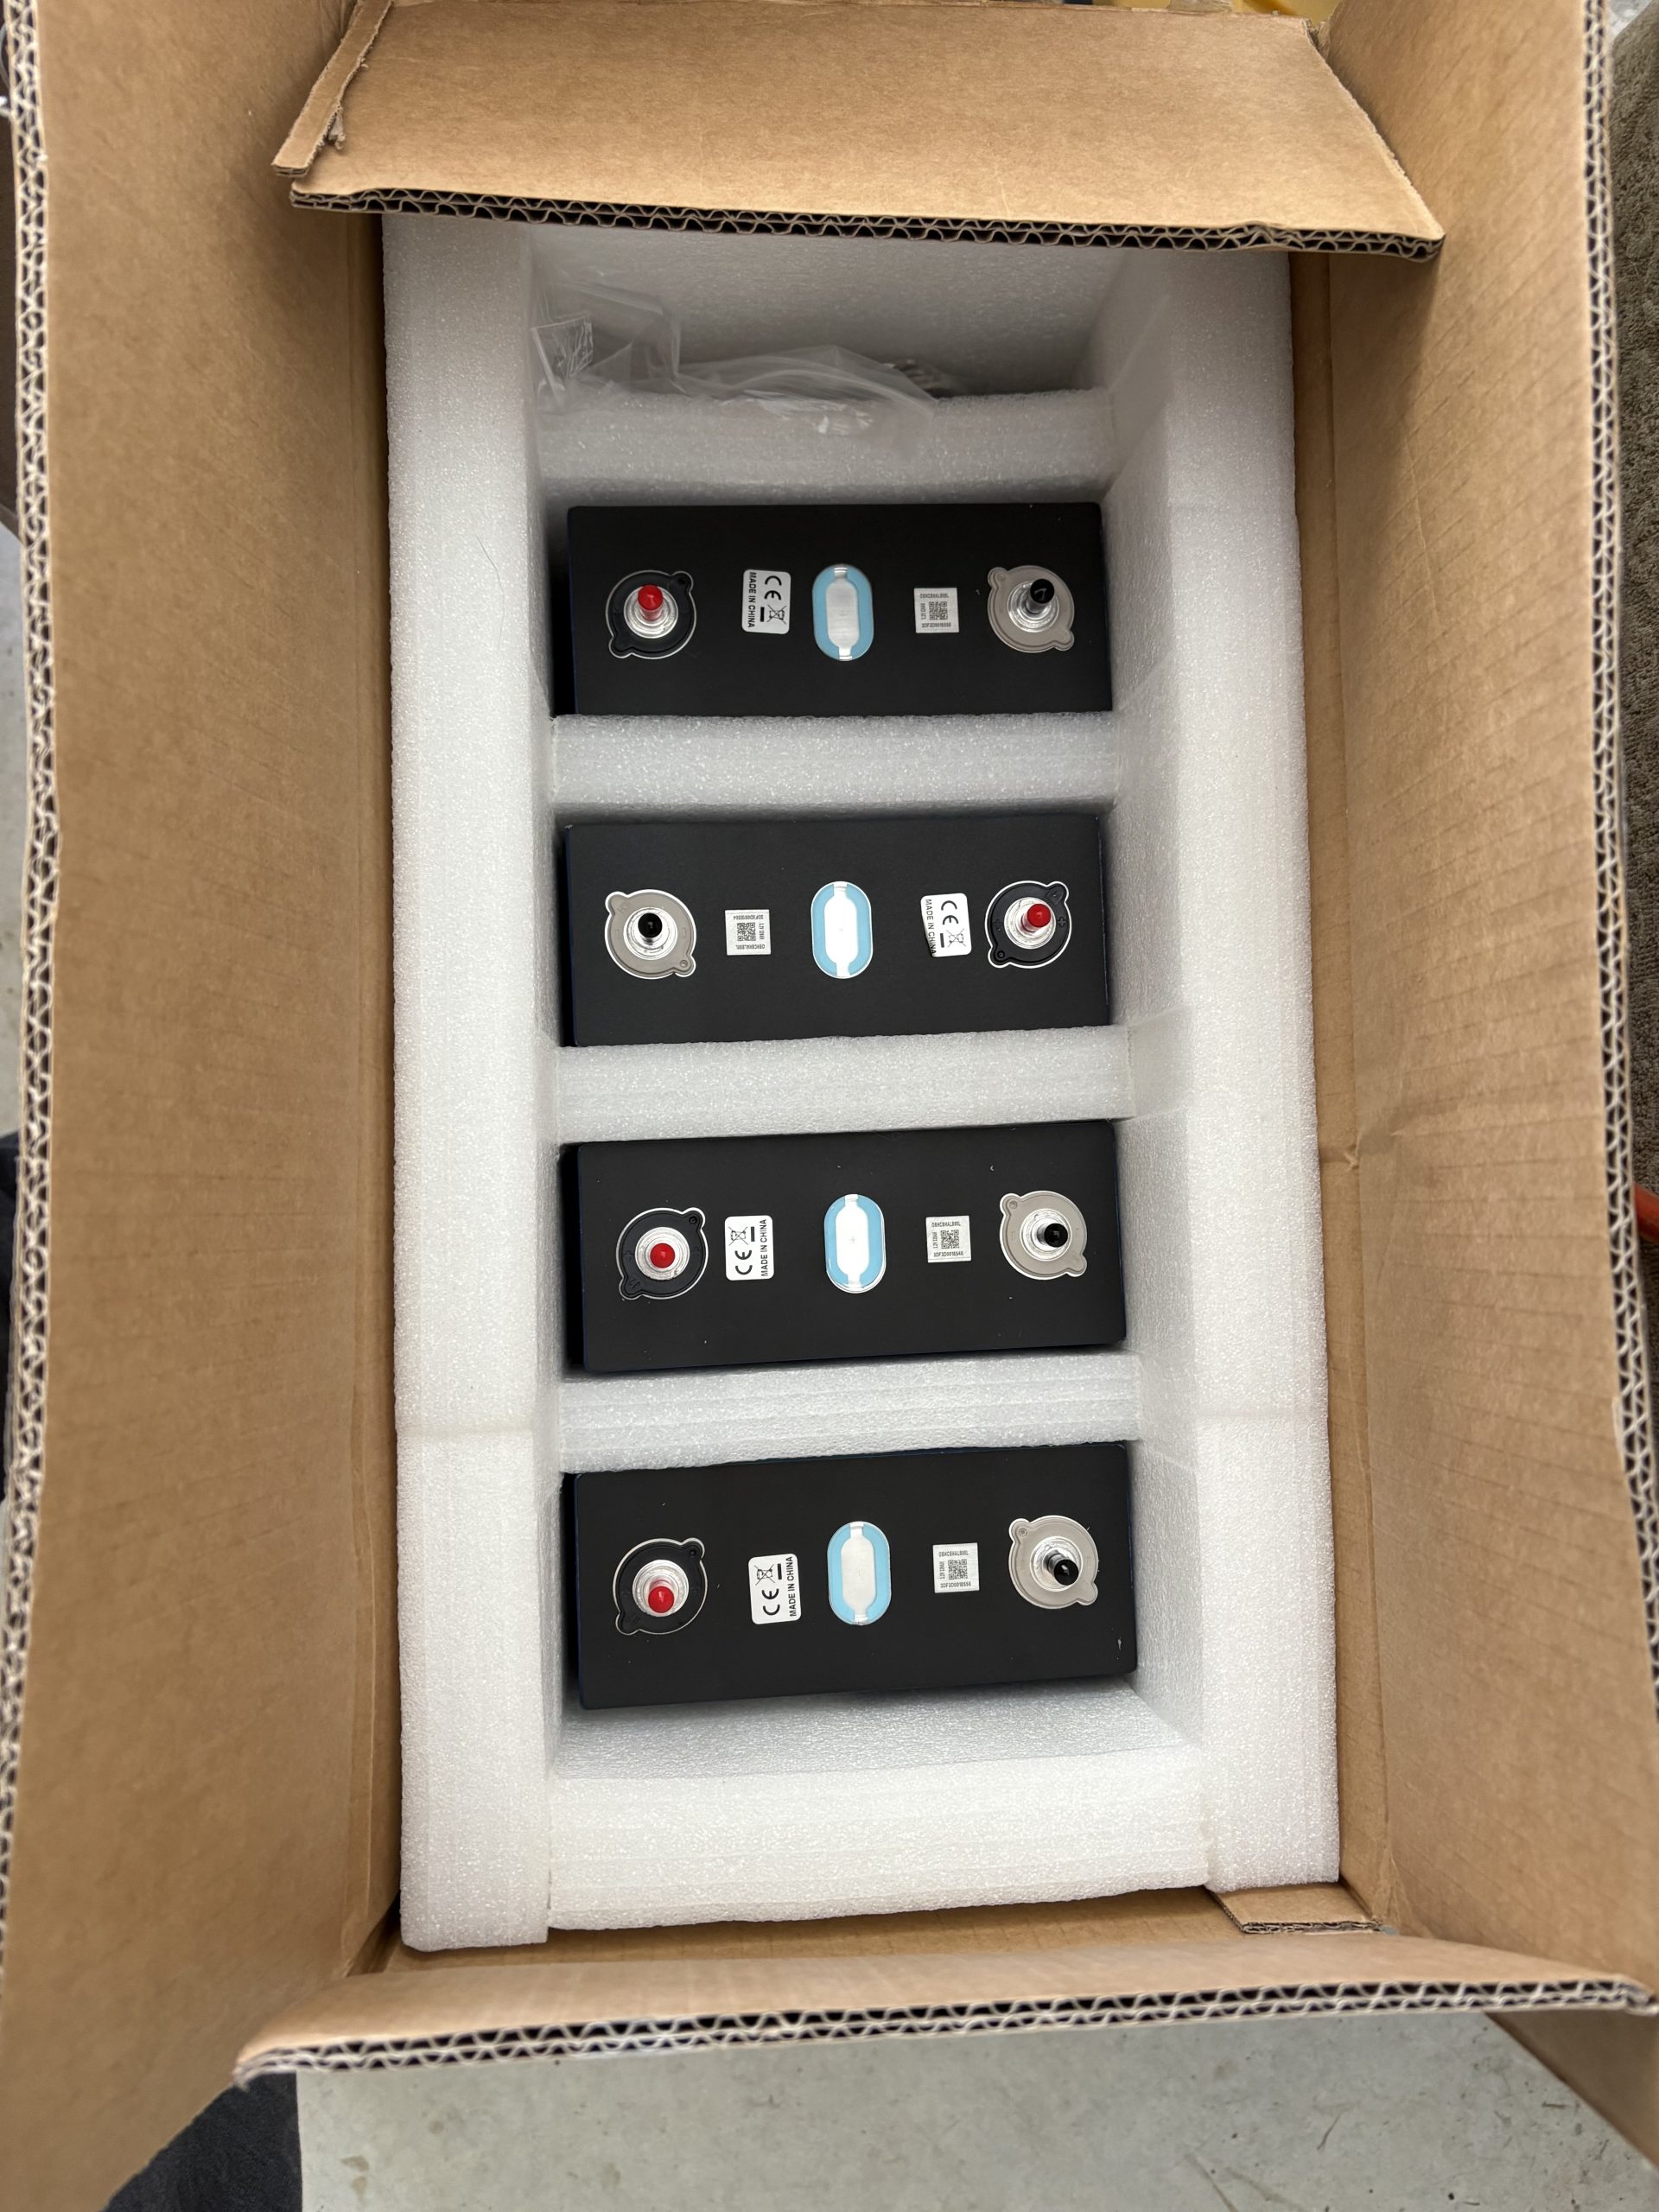
Once purchased the cells will arrive in boxes generally of 4. They come packaged really well. Thankfully, as the last shipment I received the FedEx driver just threw them off the back of the truck. Guess they were too heavy for him to bother placing on the ground and luckily there was no damage. If you have a damaged cell for whatever reason do not use it! There is too much risk of it being an issue from not having a proper capacity to self destructing. While LiFePO 4 is much safer than Li-On chemistry batteries there is no good reason to take a chance.
Let’s talk about the cells for a minute. LiFePO4 cells come in a number of different capacities. You can find 100, 105, 230, 280, 300, 315, 320Ah and many other values including the newest 628Ah cells! Some come with the posts, some with screw in posts, some with 2 posts and others with no posts at all. I have standardized on single post cells as they are generally ready to go out of the box.
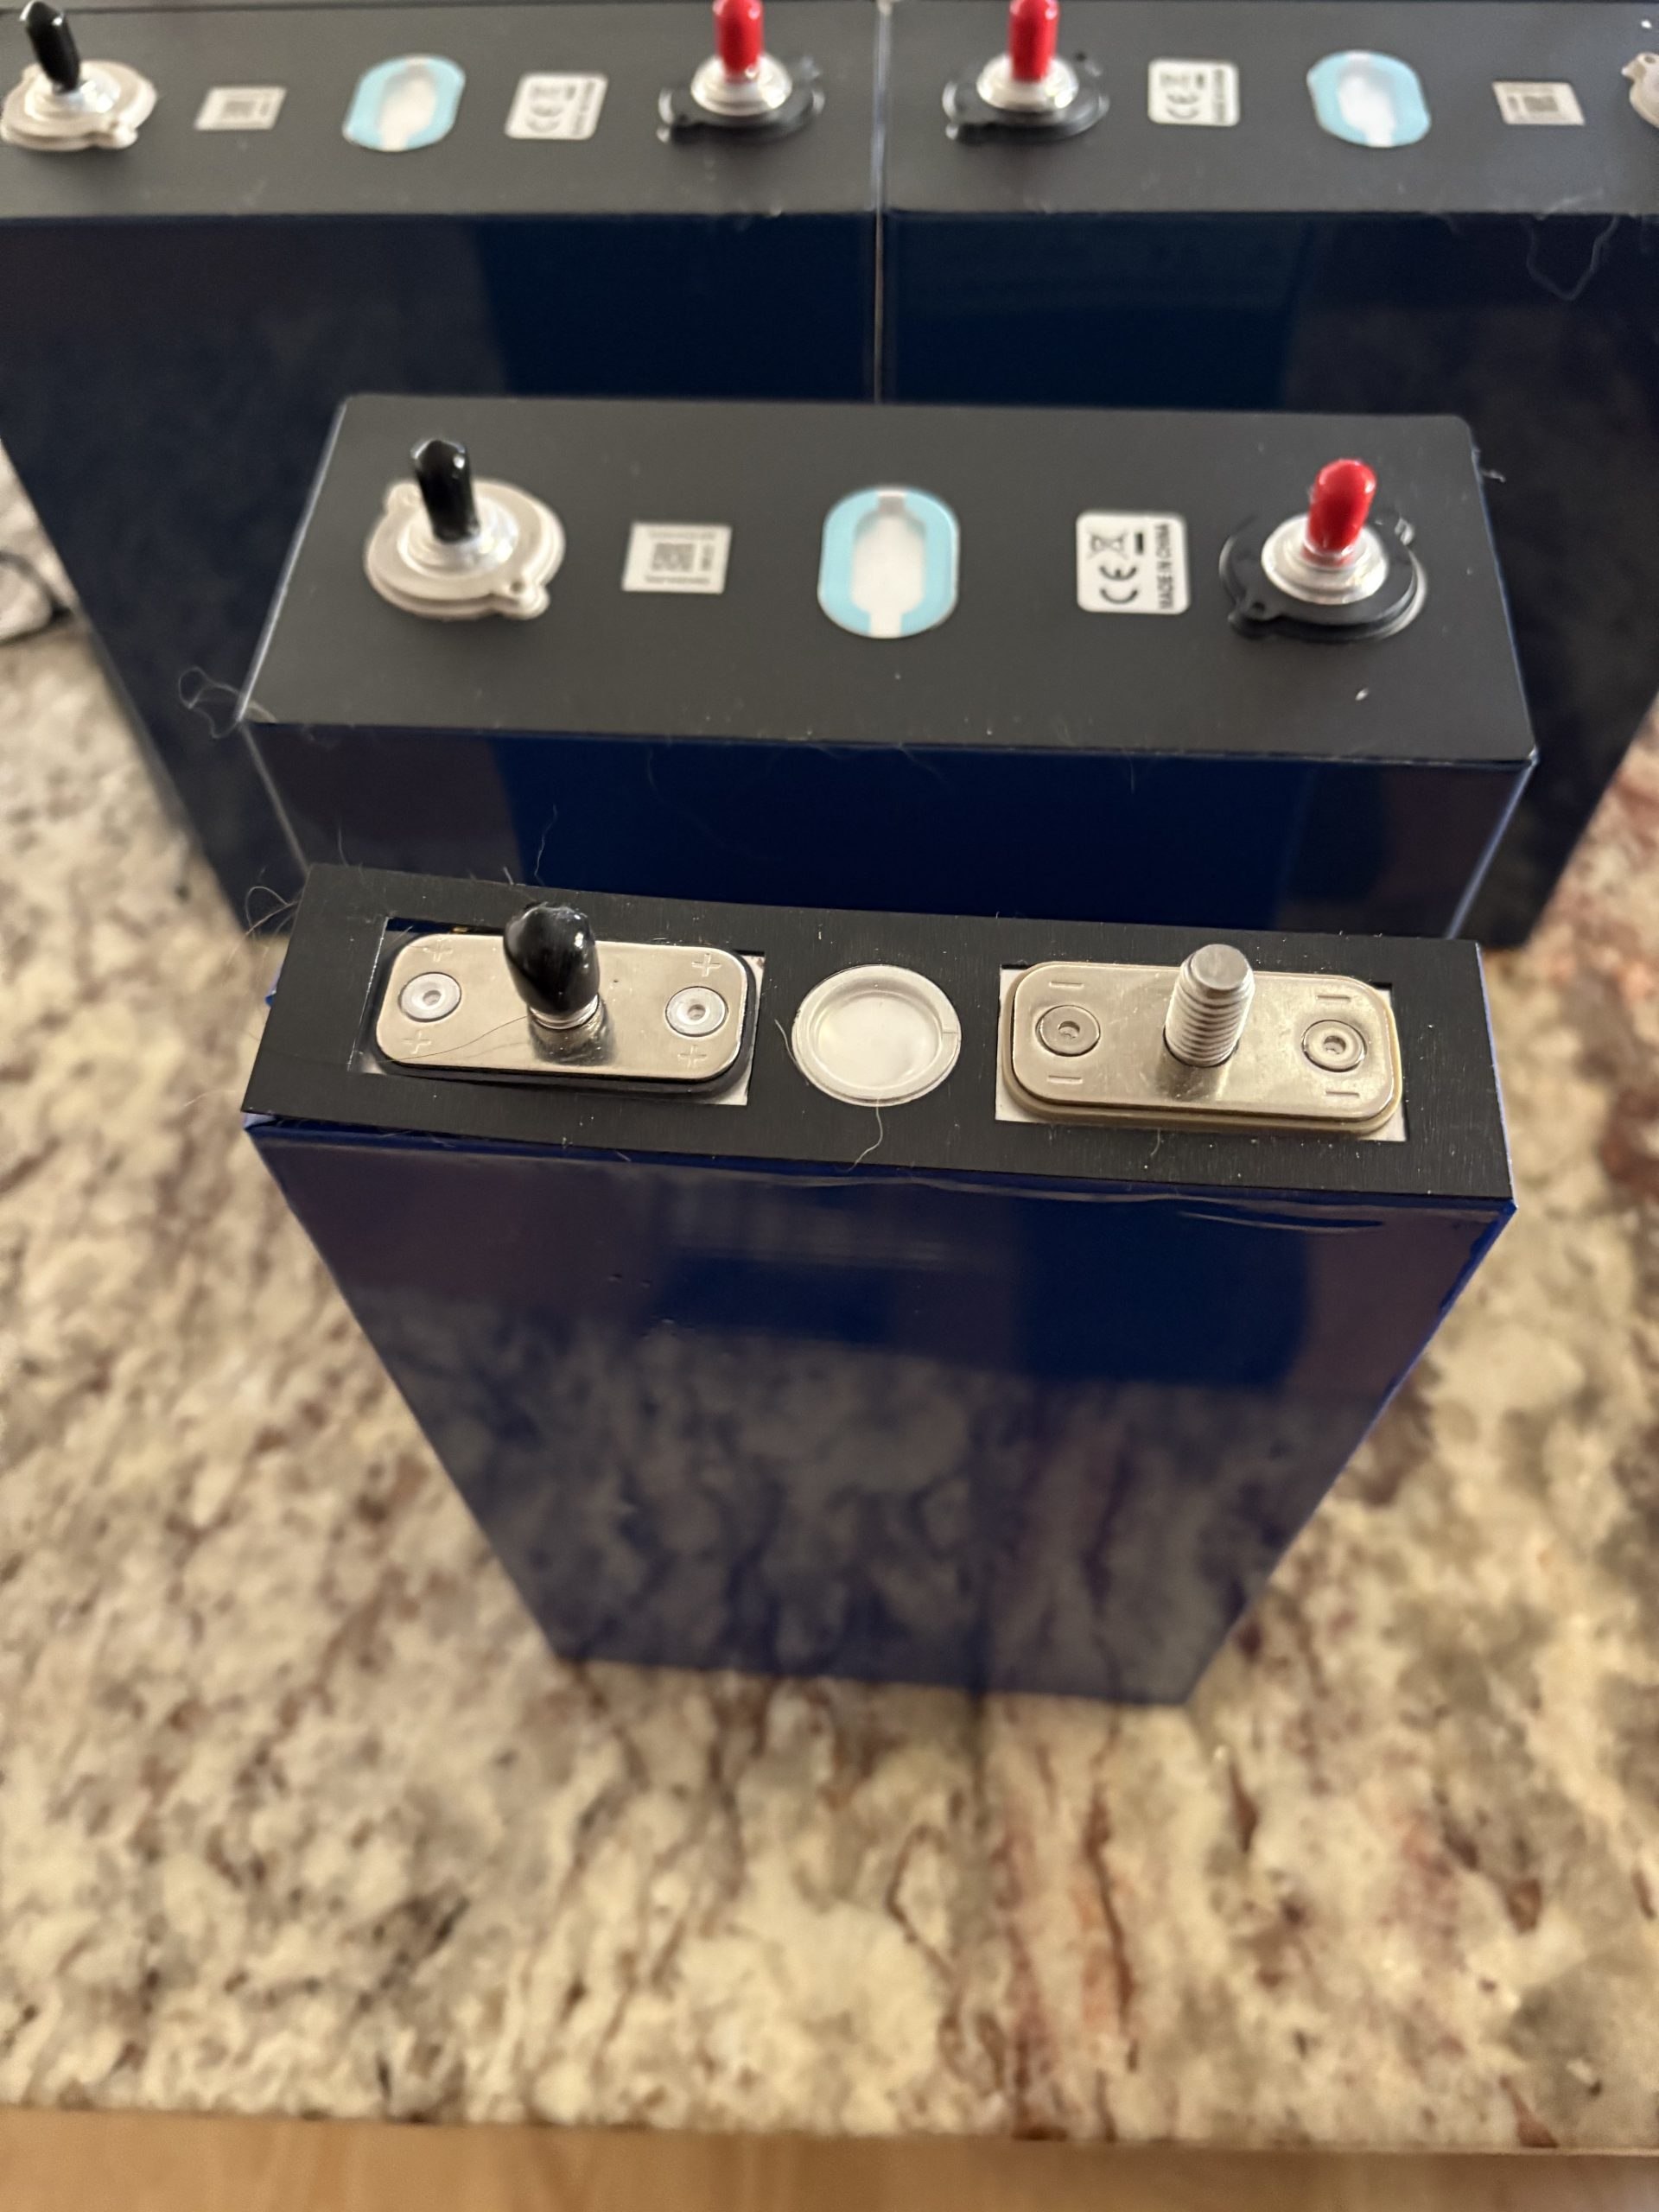
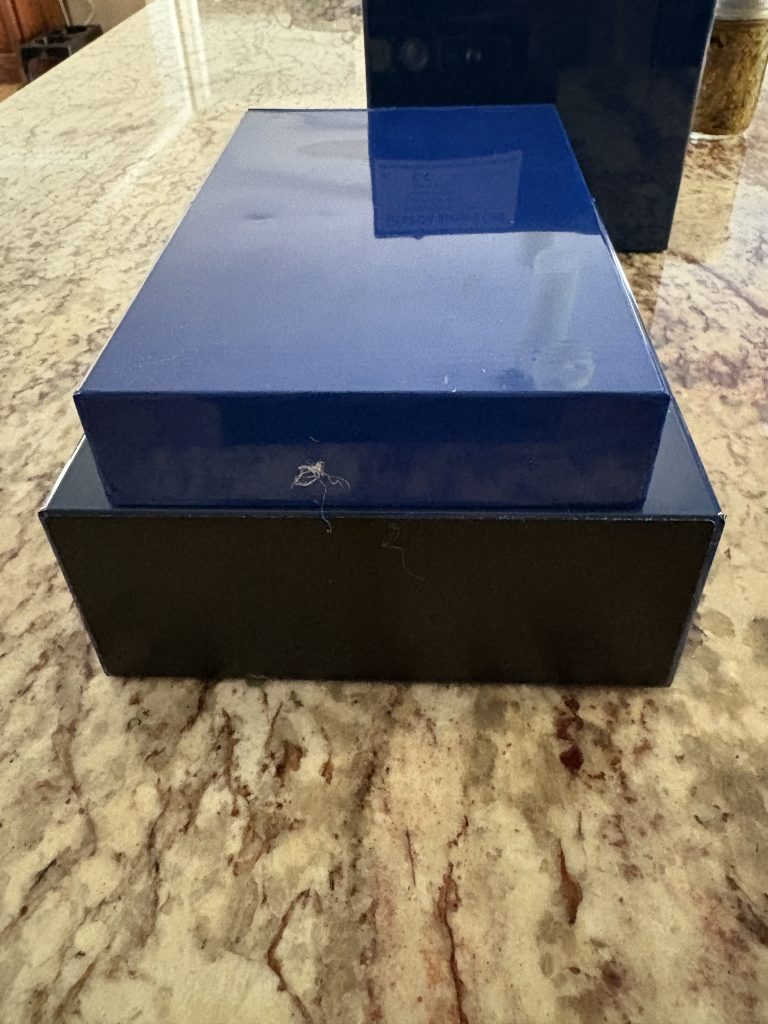
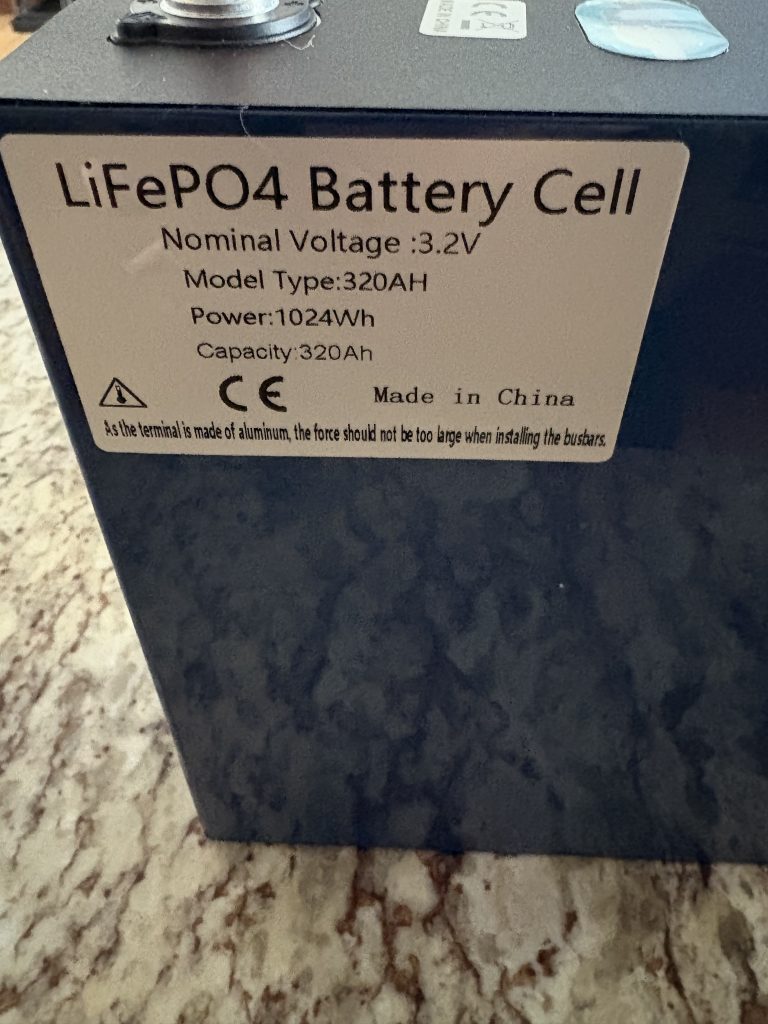

In the first couple of pictures above you can see the difference in size between a 100Ah and a 320Ah cell. Same voltage but different capacity. The 100Ah cells I acquired were for EV’s and have a 8mm post vs. the 320Ah cells that have a 6mm post. This really only matters if you have to source things like bus bars. When you purchase your cells a lot of companies will have extra goodies included. In this case you can see mine came with the bus bars, washers and nuts, cell separators, tape and caps for the posts. While we are talking about the cells let’s talk about some of the do’s and don’t. Each cell has a blue polyolefin heat-shrink wrap around it. This acts as an insulator between the cells. It’s very important to make sure you do not damage it as it’s very thin. If you have a bunch of cells in series and the cases of two touch it’s going to be a bad day and lots of sparks! That’s why you often find the yellow cell seperators included. These are epoxy resin sheets and are great for ensuring the cells are protected from each other, especially in a mobile environment. For mobile installations installing the caps is a must. For a home install where they don’t move while still good to do I don’t think it’s a necessity.
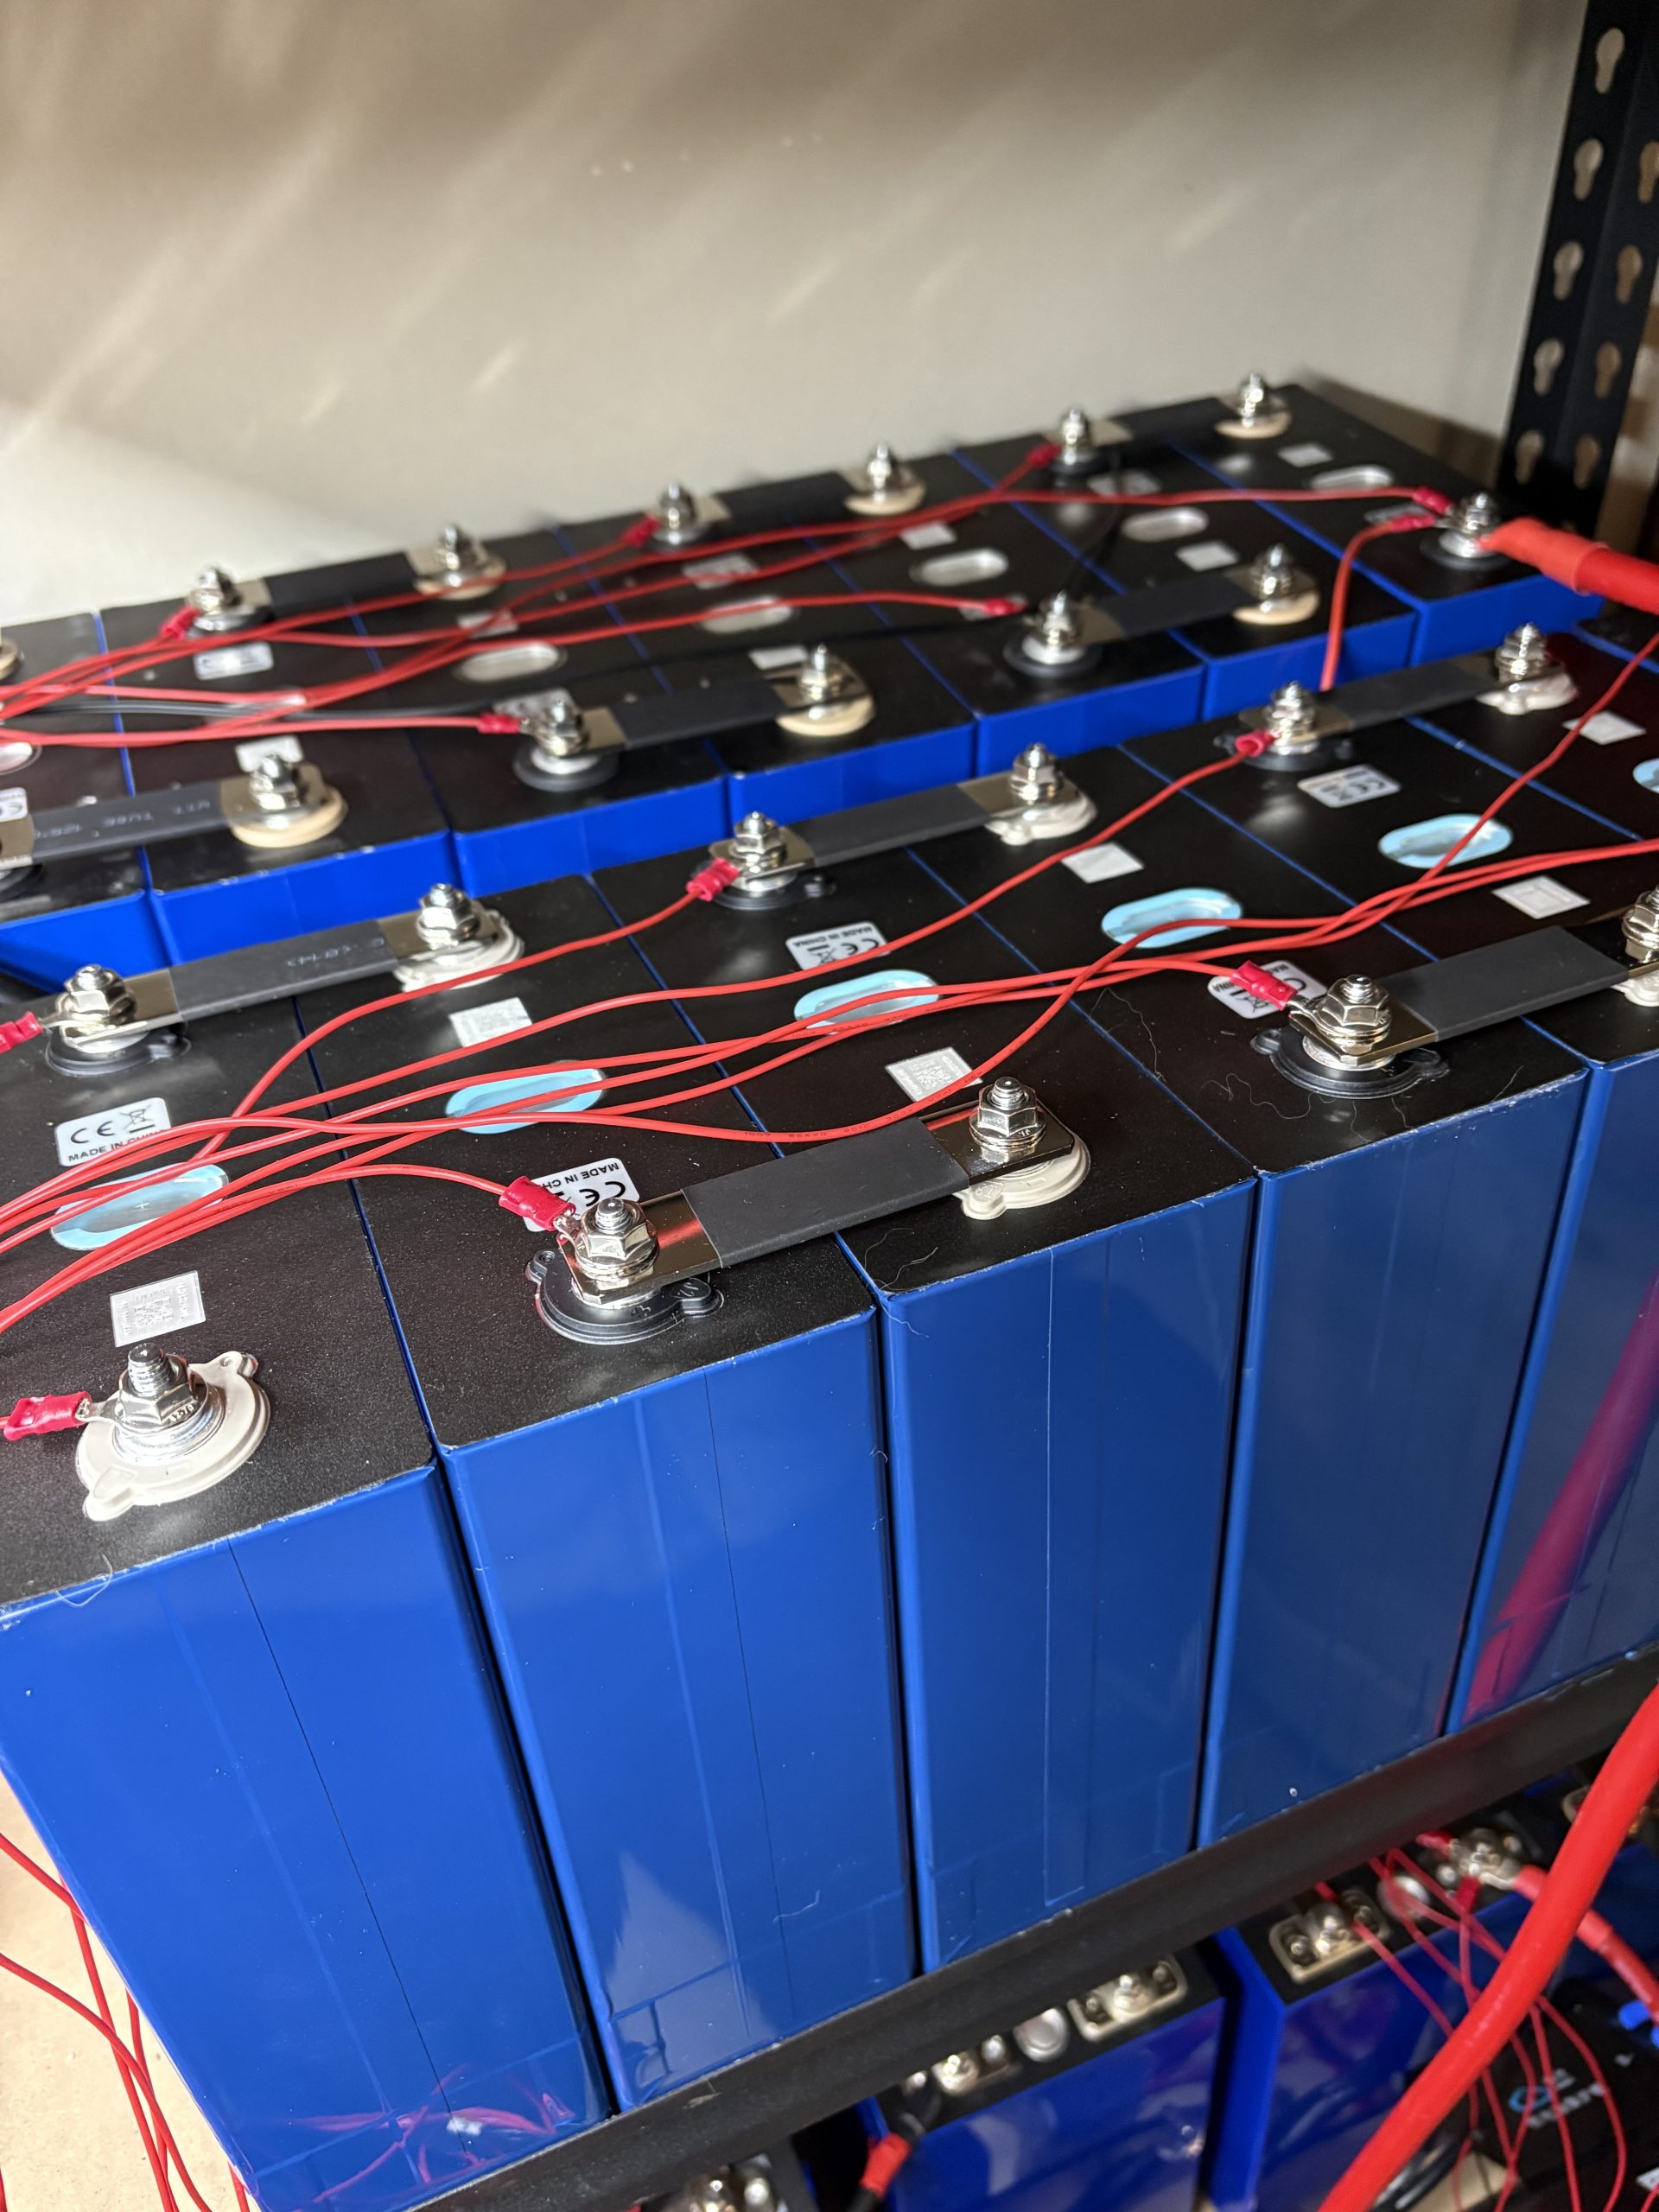
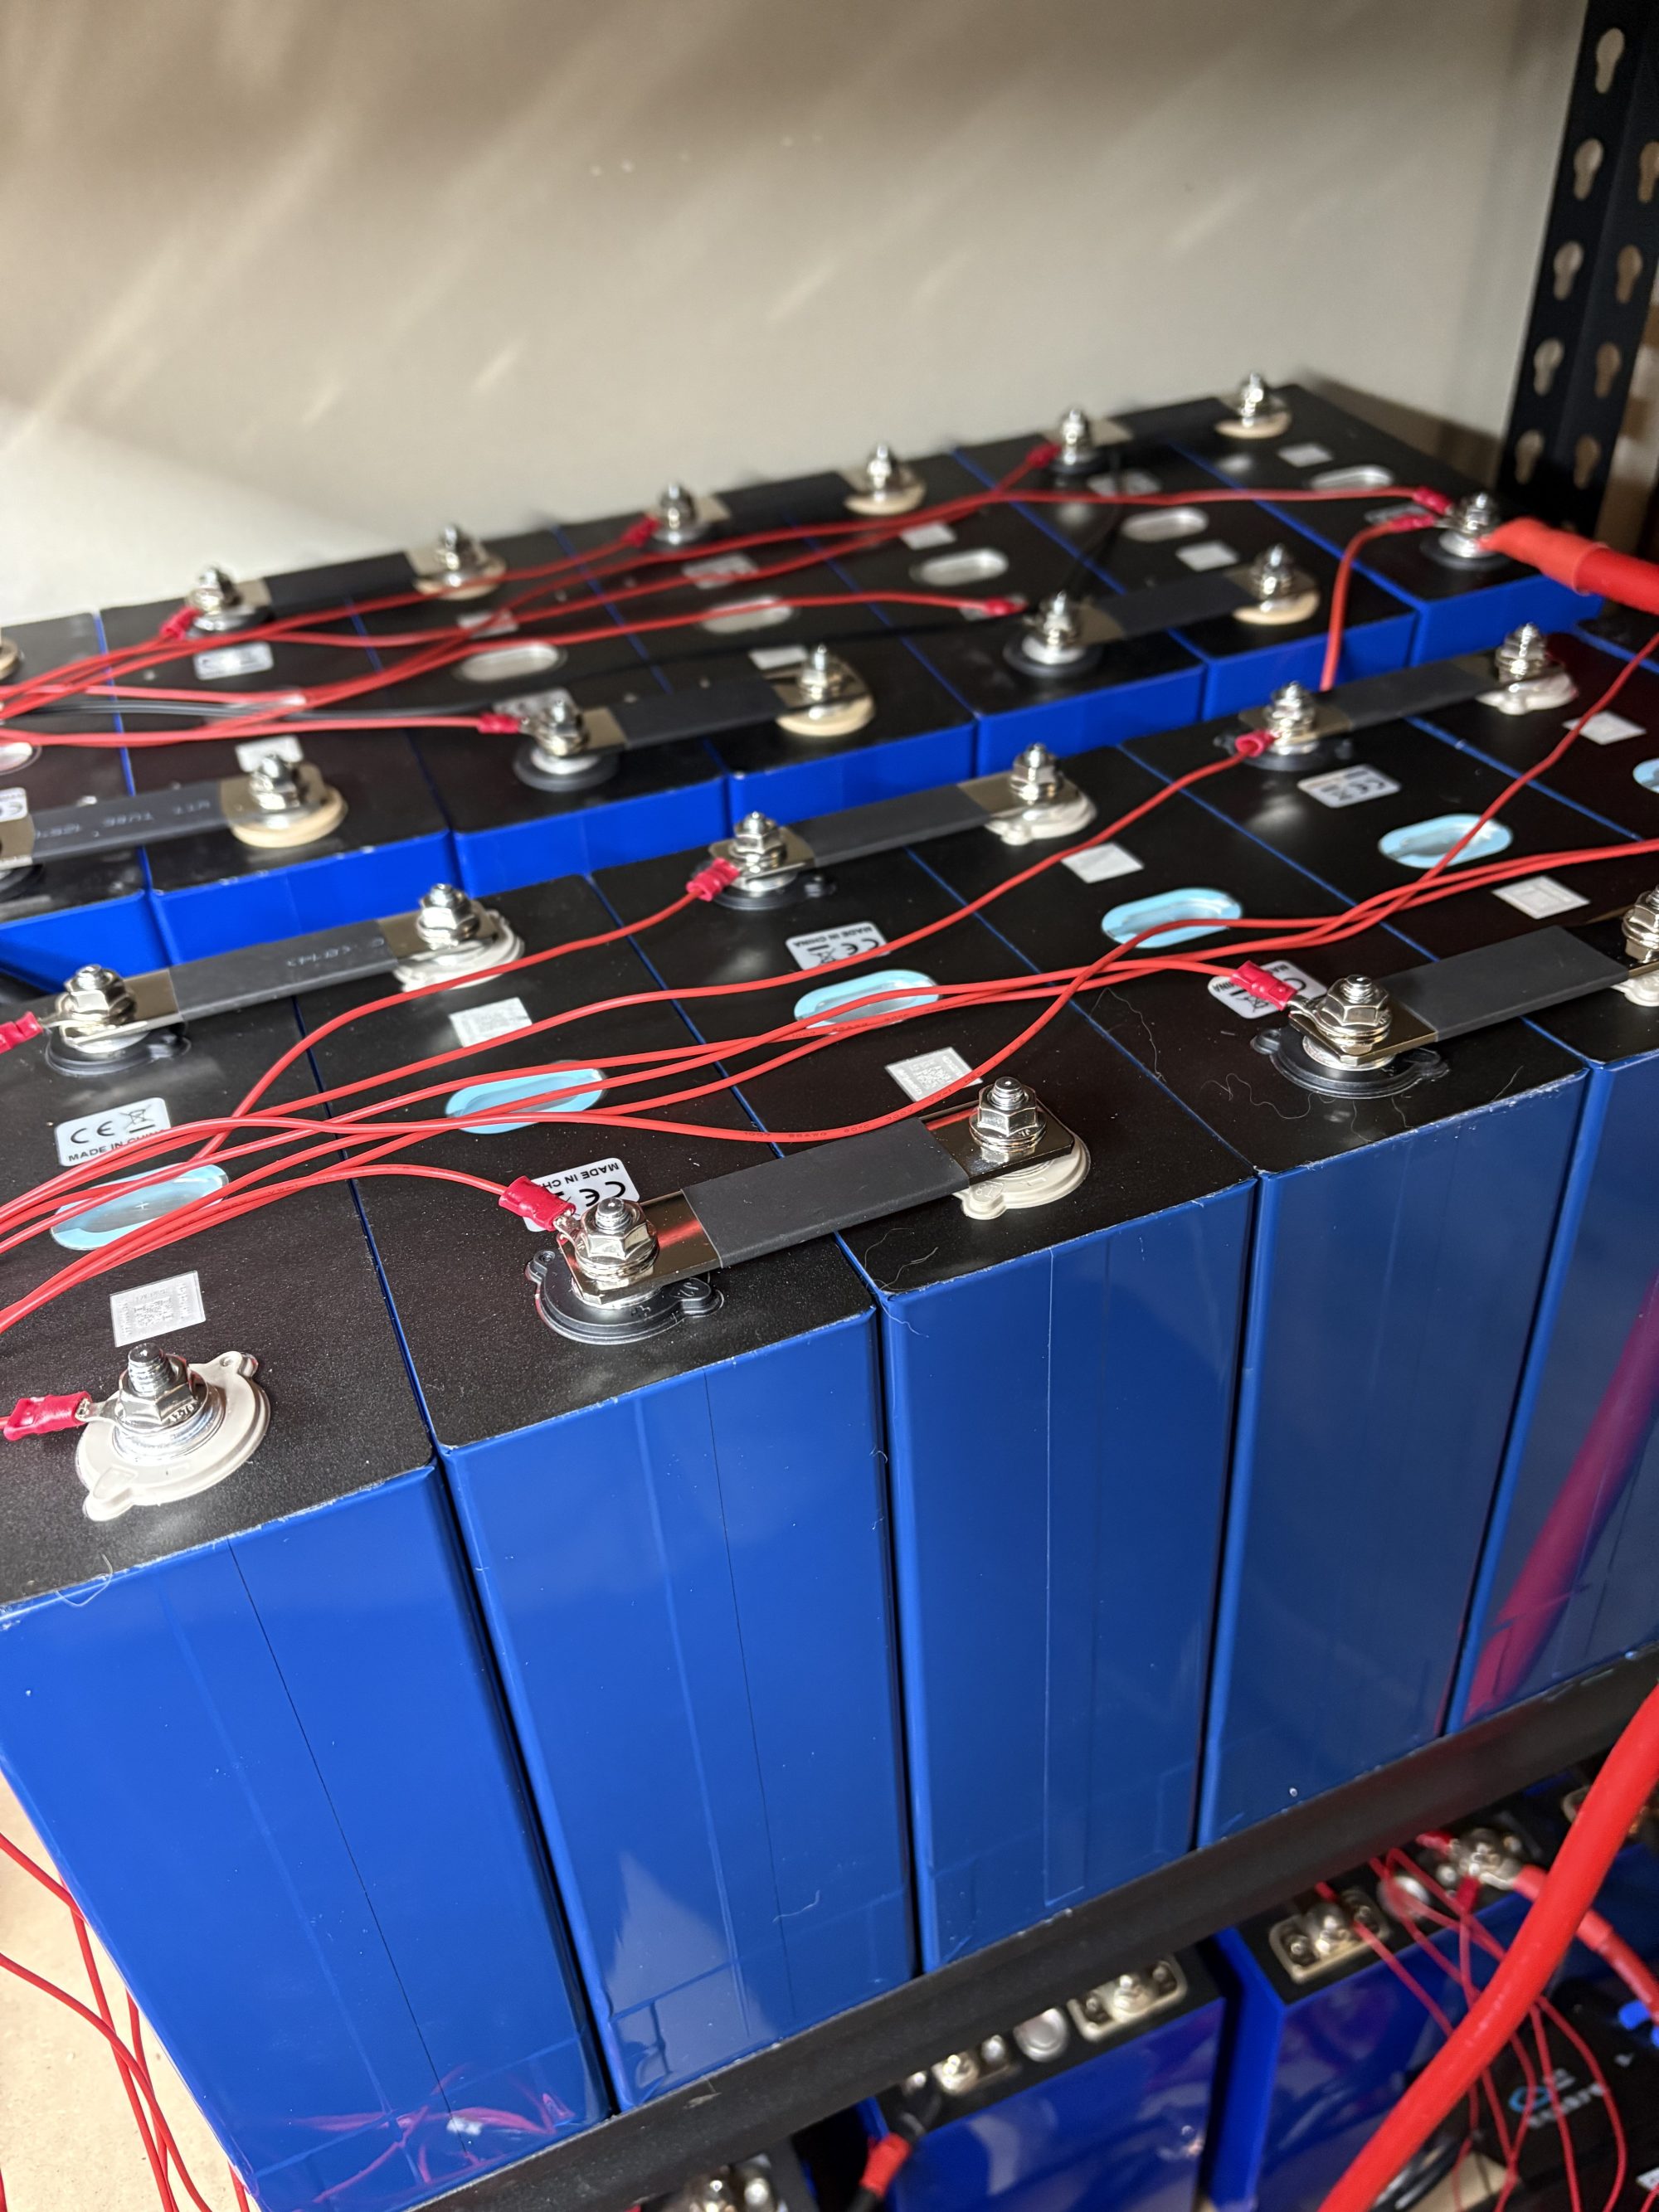
In another part of this guide I’ll be discussing the tools needed to build the battery and things like the highly debated topics of cell compression and top balancing. But for now let’s just get into the build process. The first thing is to lay out the cells. Since they are going to be in series they need to be set up where every other cell is reversed.

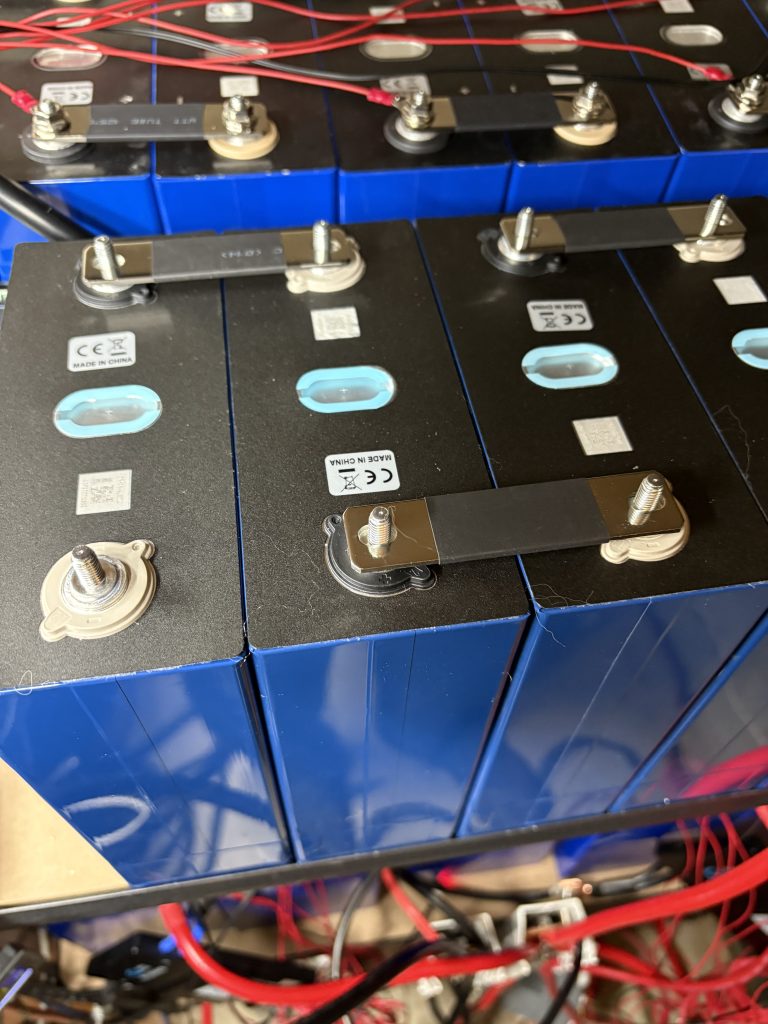
As you can see these cells have a different color ring at the base of the post in addition to the color coded caps. I’d always triple check as you do not want to make a mistake. Next step is to install the bus bars. I start by just lying them on top of the cells as in the pic above.
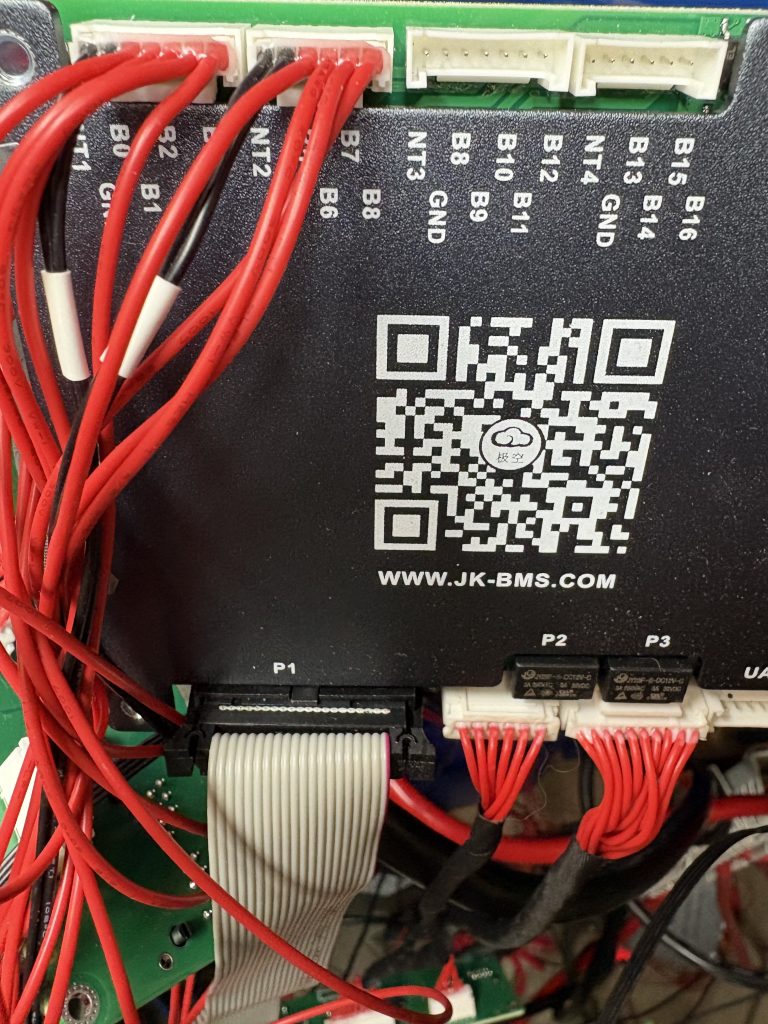
The next thing is to install the balance leads from your BMS. In this build we are using the JK PB2A16S20P BMS. There will be more discussion about BMS selection but for this guide we will be building using the JK PB2 series BMS also called the inverter BMS.
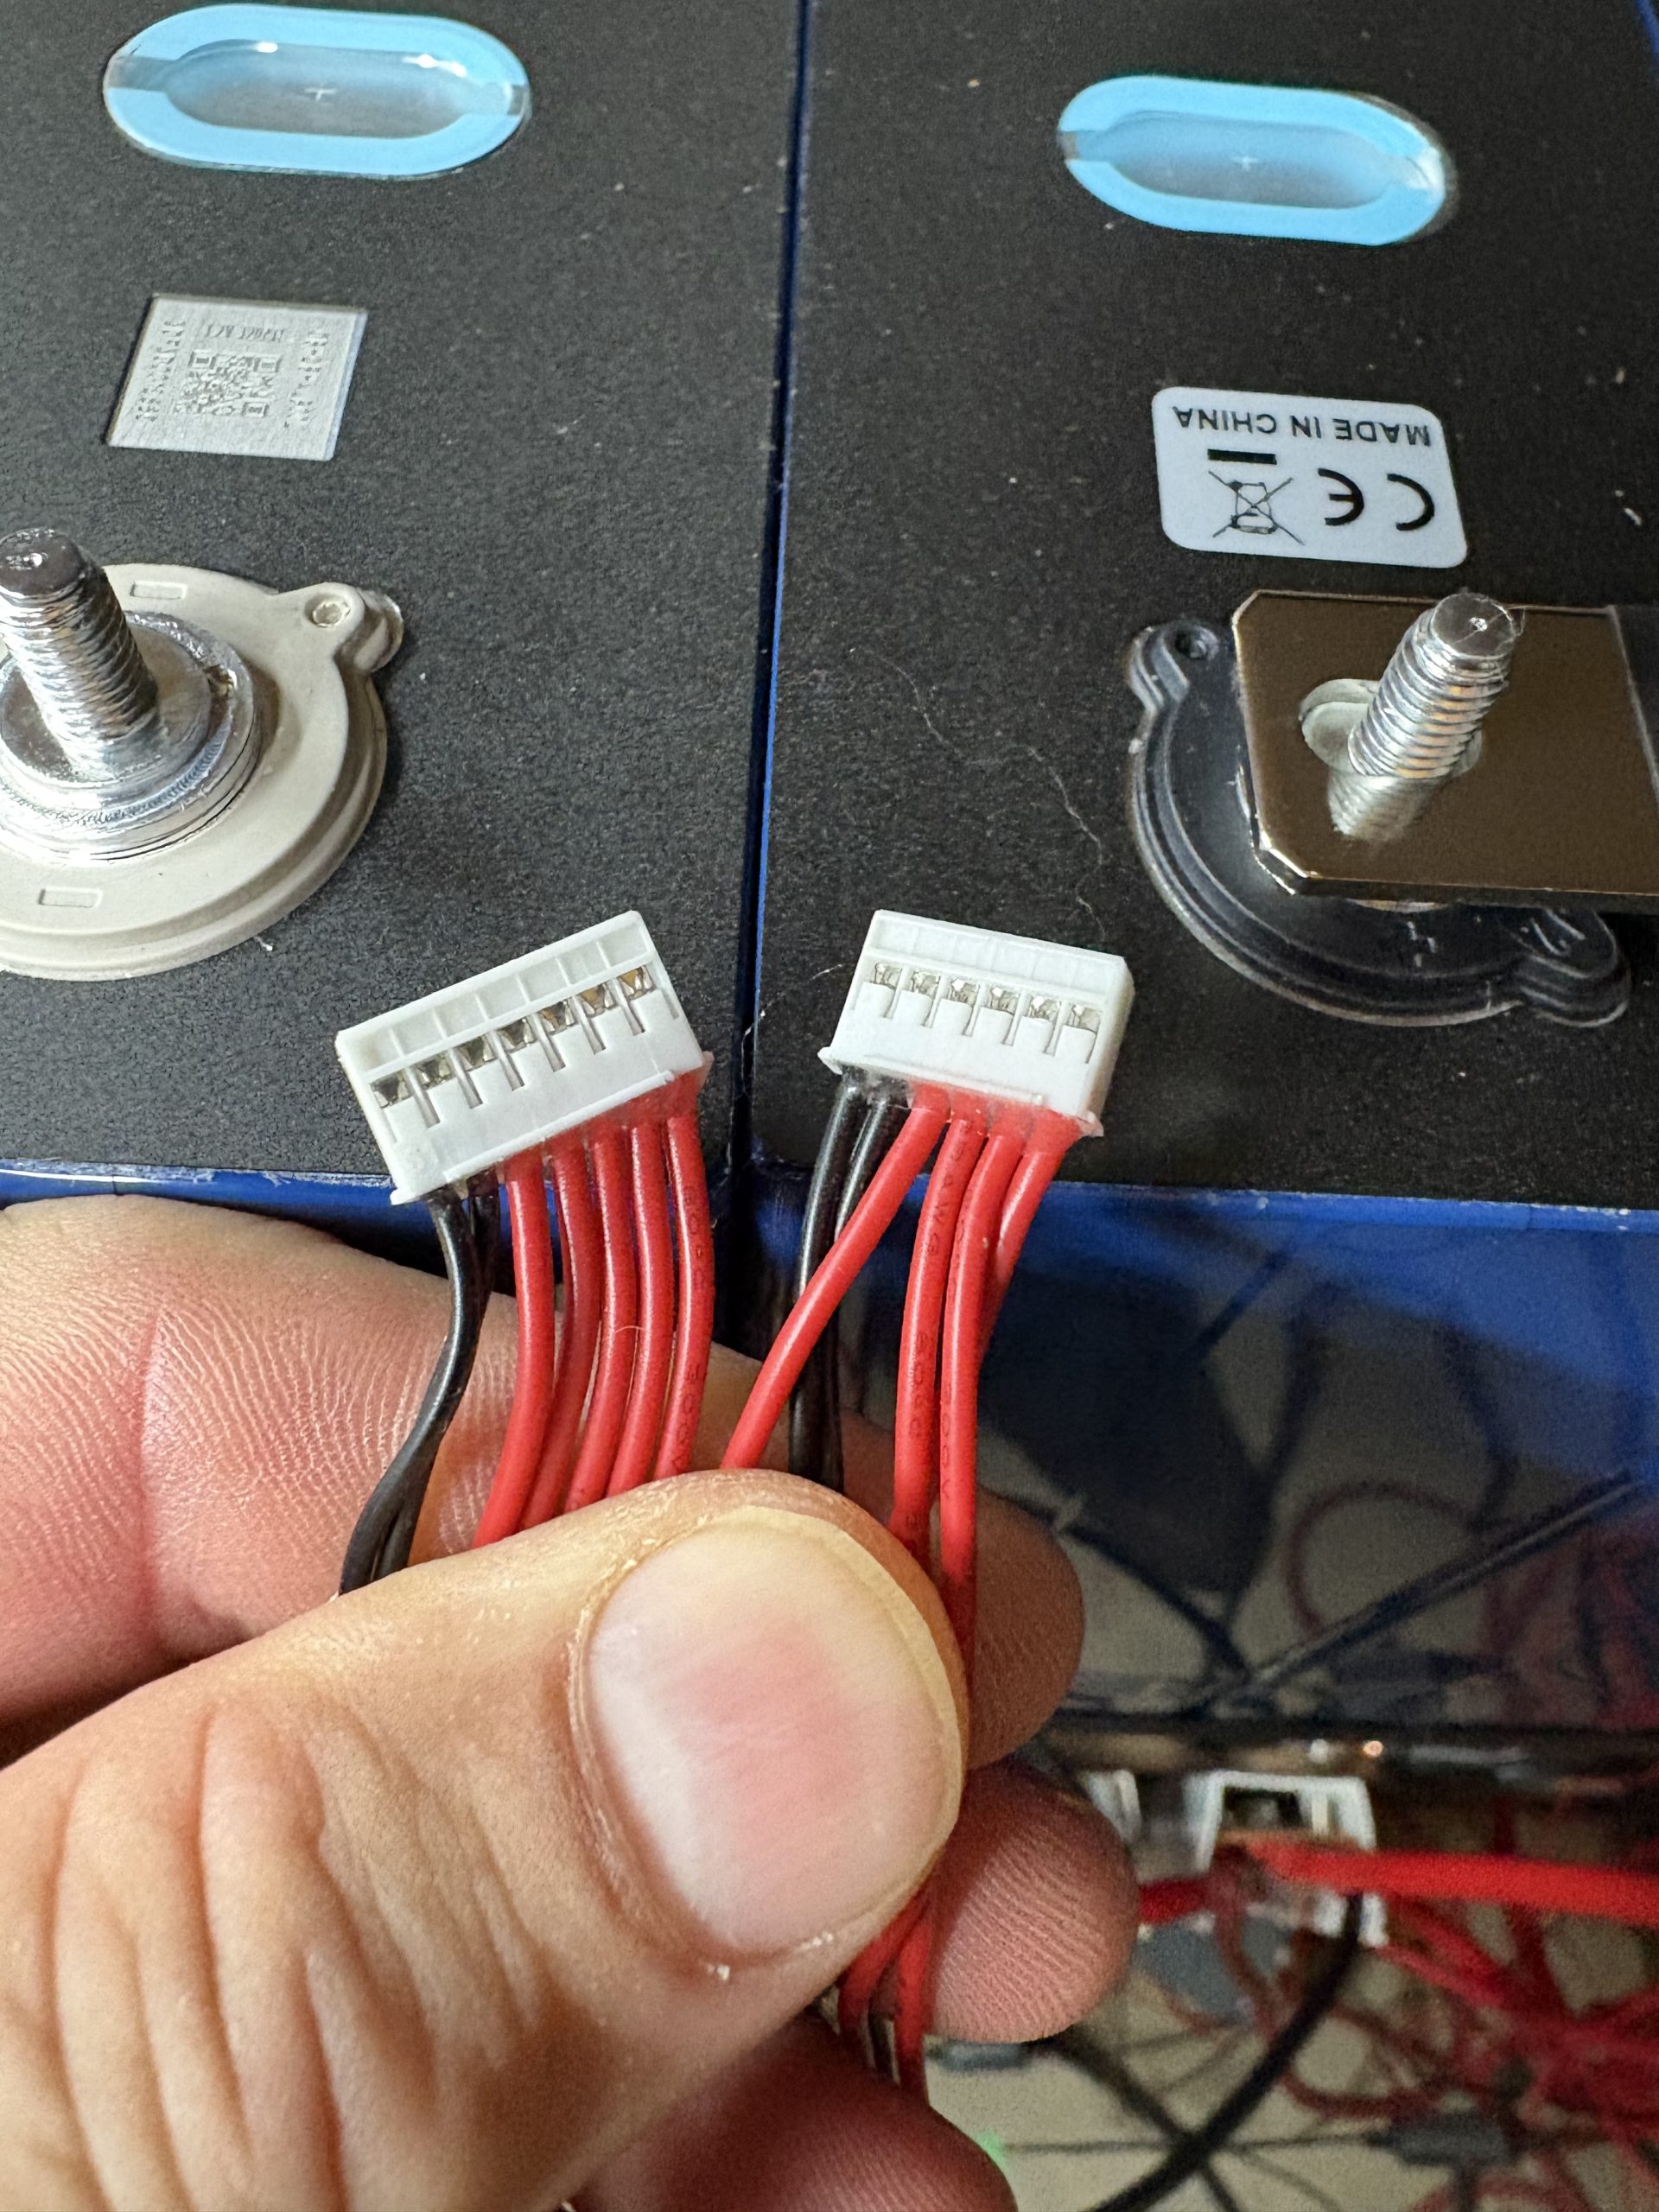
The balance leads do not come terminated. I just crimp a ring terminal on the end so it sits on top of the bus bar and under the nut. You will find that there are a a couple of different sized connectors. It’s important to start with the largest one with 8 wires. The first two black wires are temperature sensors (NT1) that you will place around the battery when you’re done. The first red wire (GND) goes to the first cell negative terminal. Yes, this does not make a lot of sense but it is very important that you get this correct. The next 4 red wires (B0-B3) go to each of the first 4 cells positive terminals. The second connector the two black wires are again temperature sensors (NT2) and the 4 red wires (B4-B7) go to the next 4 cells positive terminals. If you are making a 24V battery like I am here then you only use these two connectors. If you are building a 36V or 48V battery you would then add additional connectors and follow the same pattern. You can then tighten the nuts. It’s best to use a torque wrench and tighten to the specs per the manufacturer but if you don’t have one snug them down tightly but be super careful to not over tighten where you could strip or break a post.
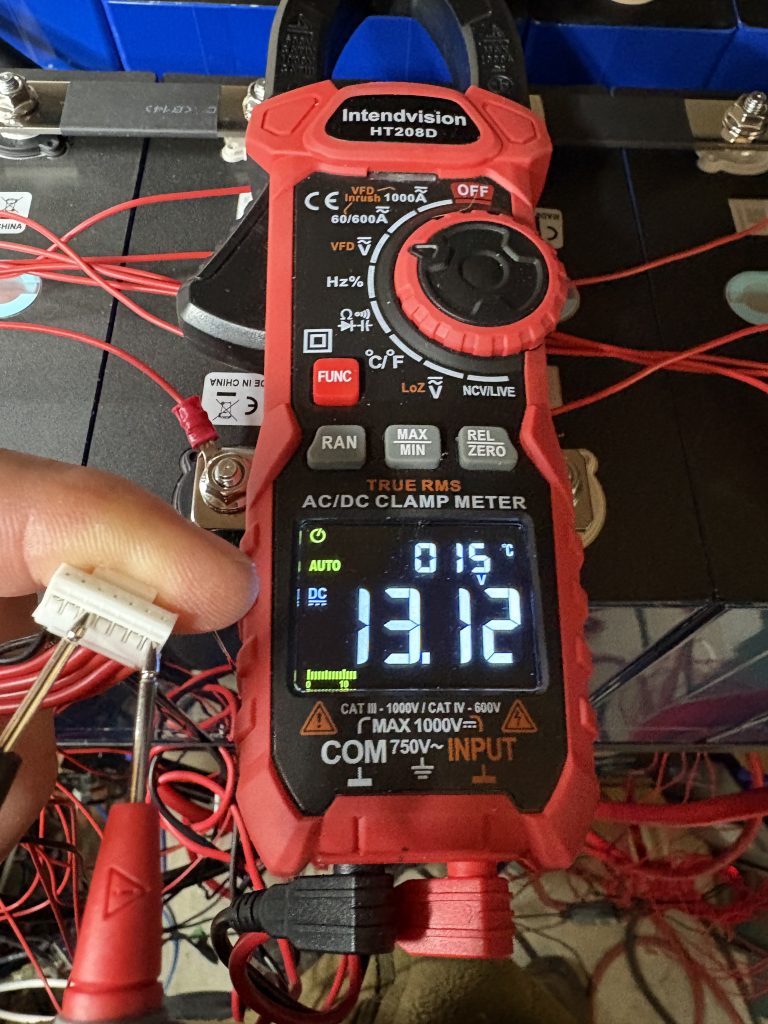
It’s imperative to make sure you install the balance cables in the correct order. If not you can damage the BMS. Once installed it’s best to take your meter and measure each of the leads to make sure the voltage multiplies up correctly. By using the third pin (the first cell negative) and each of the following cells the voltage should increase by the voltage of the cells. In this case the cells came in at about 3.28V. So pin 3 and 4 should show 3.28V. Pin 3 and 5 6.56V, etc. In the picture above you can see me testing pin 3 and 7 showing 13.12V which is 4 X 3.28. When moving to the next connector you still use pin 3 from the first connector and then each of the red leads. Once they all check out properly then you can plug them into the BMS.
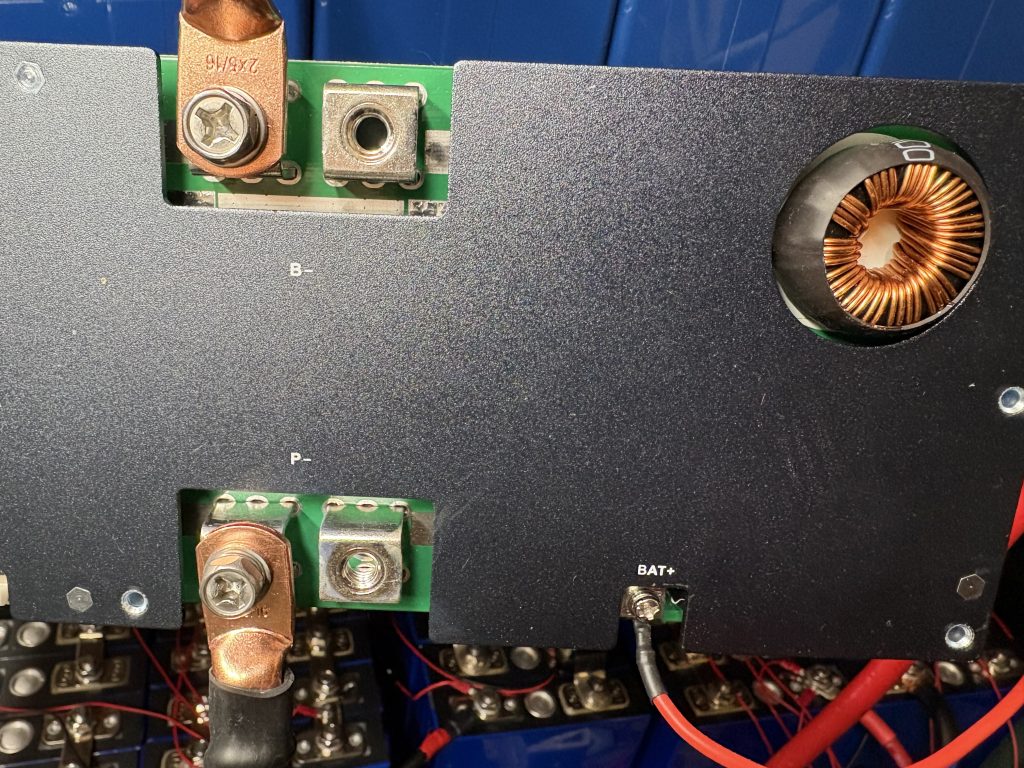
Next you want to connect the the BMS. The B- screw should go to the first cell negative terminal, the same one that has the balance lead. The last cell positive gets the BMS power lead marked BAT+ and the positive power out cable to your system. the P- screw on the BMS is the negative to your system. The BMS controls every thing from the negative side of the battery.
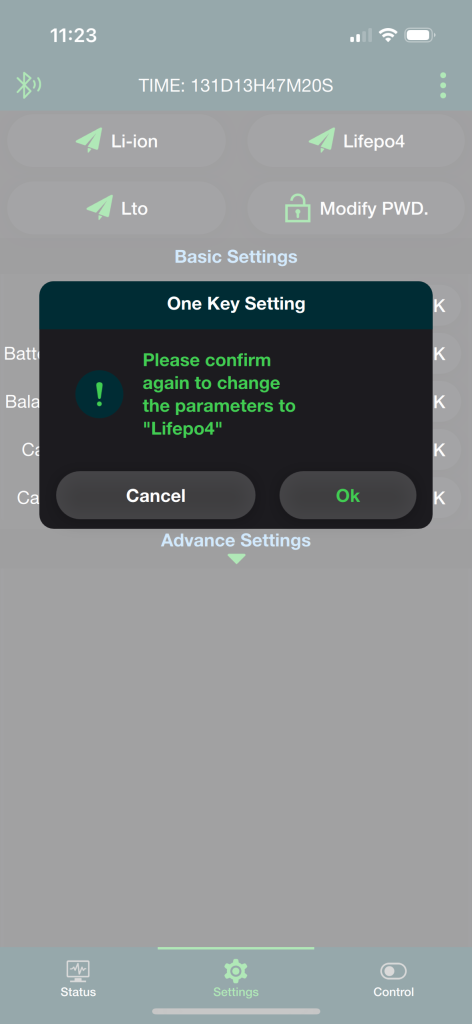
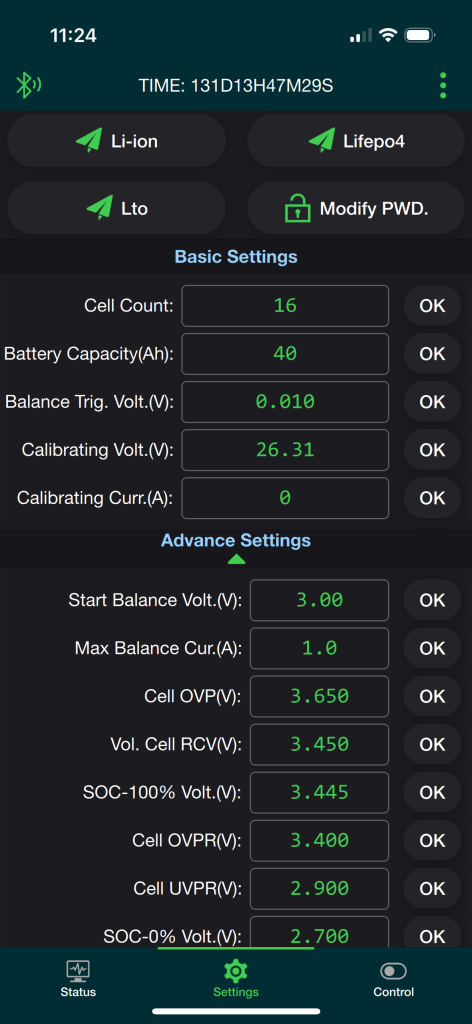
Once you have at least the B- and BMS power cable connected you can turn on the BMS via the power button. You now need to go to your phone’s App Store and install the JK BMS application. Once done fire it up and you should see your battery. Click on it and the first thing to do is go to the settings tab and put in the BMS password. By default it is 1234. It’s good practice to change this especially if this device is mobile as anyone with the app on their phones would be able to log into your battery and change settings. Once you see the battery details, the first step is the select the LiFePO4 button so the BMS sets the correct initial settings for the battery chemistry. It’s important to do this first as if you do not and have to do it later you will have to reenter all your settings again. Once done you will see the battery come up (see the 3rd image). As you can see the cell count and capacity are incorrect. For a 24V battery the count should be 8 cells and in this case the capacity is 320Ah.


Once those changes have been completed you have successfully built your first battery! In the second part we will talk about battery settings, integrating the BMS into the rest of your system and more.